Thursday, September 11, 2008

Badge Holder Mini Album

I bought some plastic name badge holders a loooooong time ago and finally decided to dust them off and use them. My husband's sister had a baby a couple of months ago and everyone has been taking tons of pictures. I got a hold of a few and made this fun little album.


I used TAC's Hip Hop paper collection and Essential Elements. This album is very quick and simple to make. Each badge holder holds two pieces of the Hip Hop paper. I adhered a photo to the paper and then slid it inside each holder. I placed all the Essential Element tags on the outside of the badge holders, after I embellished them, and used small book rings to hold the album together.

I'm sure I could do a little more embellishing, but I also love the simple look of this. It's the perfect size to throw in my purse so that I can be ready to show off little Chase, and I don't have to be afraid that I'm going to tear anything up on the album.


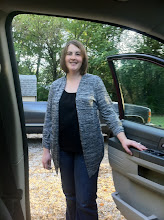
Doesn't Chris look great holding little Chase? I can't wait until we get to be parents someday. He's going to make a great dad!


Supplies-

Hip Hop Fly With It collection
Simple Bet
alphabet set
fine black pen
Essential Elements
misc. green ribbon
name badge holders
book rings
sanding block

Thursday, September 4, 2008

Bandana Technique

I had heard about the Bandana Technique and decided that I needed to try it...it's so much fun! I taught the technique at my August Technique club. The secret is to have a really good white gel pen. Here's the card that we made.


The stamp set that I used is called Petal Pack. It has a lot of fun images to choose from. The sentiment comes from one of TAC's Level A hostess sets. (you can get it for free when you have a $100 FunShop!)


There are so many different areas that you can apply your white pen to. I made up this little chart to show my guests just a few of the areas that they could fill in. Each one gives a different look.

My inspiration for this card came from Vicki Hook. She has a great post about this technique here and shares another example here. Be sure to check out her blog- she does great work!!

Saturday, August 30, 2008

The Journal Creations

I wanted to share some more pictures from our Night with the King event. We started working on the journals at 10pm and before we no it it was after 1 in the morning!! We were having so much fun!! Each girl was given half of a composition notebook to decorate. I've posted pictures of their journal creations and then some other pictures that were taken throughout the night.


Kersten is showing off her door prize.


Ashley won something, too.


Kersten and Jordyn...I love this picture!


Emily


Jordan- she is an amazing paper crafter!


Lauren hard at work


Cara and Cristen


Monday, August 25, 2008

A Night with the King


These are the fun gift bags that I designed for a girl's night that we had at our church this past Friday night. The event was called, 'A Night with the King' and it was an all nighter for girls 6th-12th grade. We did manicures, pedicures, mini devotionals, a journal project and much, much more. I had so much fun getting to know each of the girls better and just goofing around. One of the girls painted my toenails for me...they are pink with silver stripes...interesting, huh? :) I'll be sharing their journal creations later. Thanks for reading!

Oh, if you wonder why a lot of the bags have the initial 'K', it's because there were 8 girls whose name started with 'K'! How wild!!

Supplies-
All supplies are by The Angel Company except for the gift bag and glitter.

Sunday, August 17, 2008

Newlyweds


This is a project that I made at The Angel Company's seminar in June. It's a little hard to tell from this picture, but the base for this project is a sheer scalloped coaster. We used the Sydney Circle Album kit to embellish the coaster. This would make a great gift idea and they are quick and easy to make.


This is a picture of my sister-in-law, Nikki, and her husband, Cody. They got married yesterday in a beautiful, outdoor wedding. I'll be posting a couple of wedding pictures soon!
Supplies-
Plum colored ribbon from Amelia Ribbon collection
Orange cardstock from Penelope coordinating cardstock

Monday, August 11, 2008


Just a short, quick post for you tonight. Here's a monochromatic card that I'll be teaching at my technique club later this month. I used one of my favorite Palette ink colors, Water Lily Green, on the white cardstock and then used VersaMark ink on the turquoise cardstock.

I hope you're having a great week. I go back to work this Friday and I'm trying to get lots of crafting in before then. I've had a very restful summer and I'm ready to get back to school and start teaching again.

Supplies-
Blooming Builders
Ordinary Greetings
Water Lily Palette Ink
VersaMark

Sunday, August 10, 2008


I finished stamping this card and still thought it needed something...it needed some bling! The butterfly images are from a TAC set called Butterfly Bits. I used Violete Palette ink to stamp each butterfly and used Crystal Stickles to add some 'bling'. With this stamp set, you layer images. I wanted the solid image to be a shade lighter, so I inked up my stamp and stamped once on to scratch paper and then a second time on to my white card base. I stamped the next layer without stamping off first - I used the color in it's full strength.